Using a Knative Service as a source
In this tutorial, you will use the CloudEvents Player app to showcase the core concepts of Knative Eventing. By the end of this tutorial, you should have an architecture that looks like this:
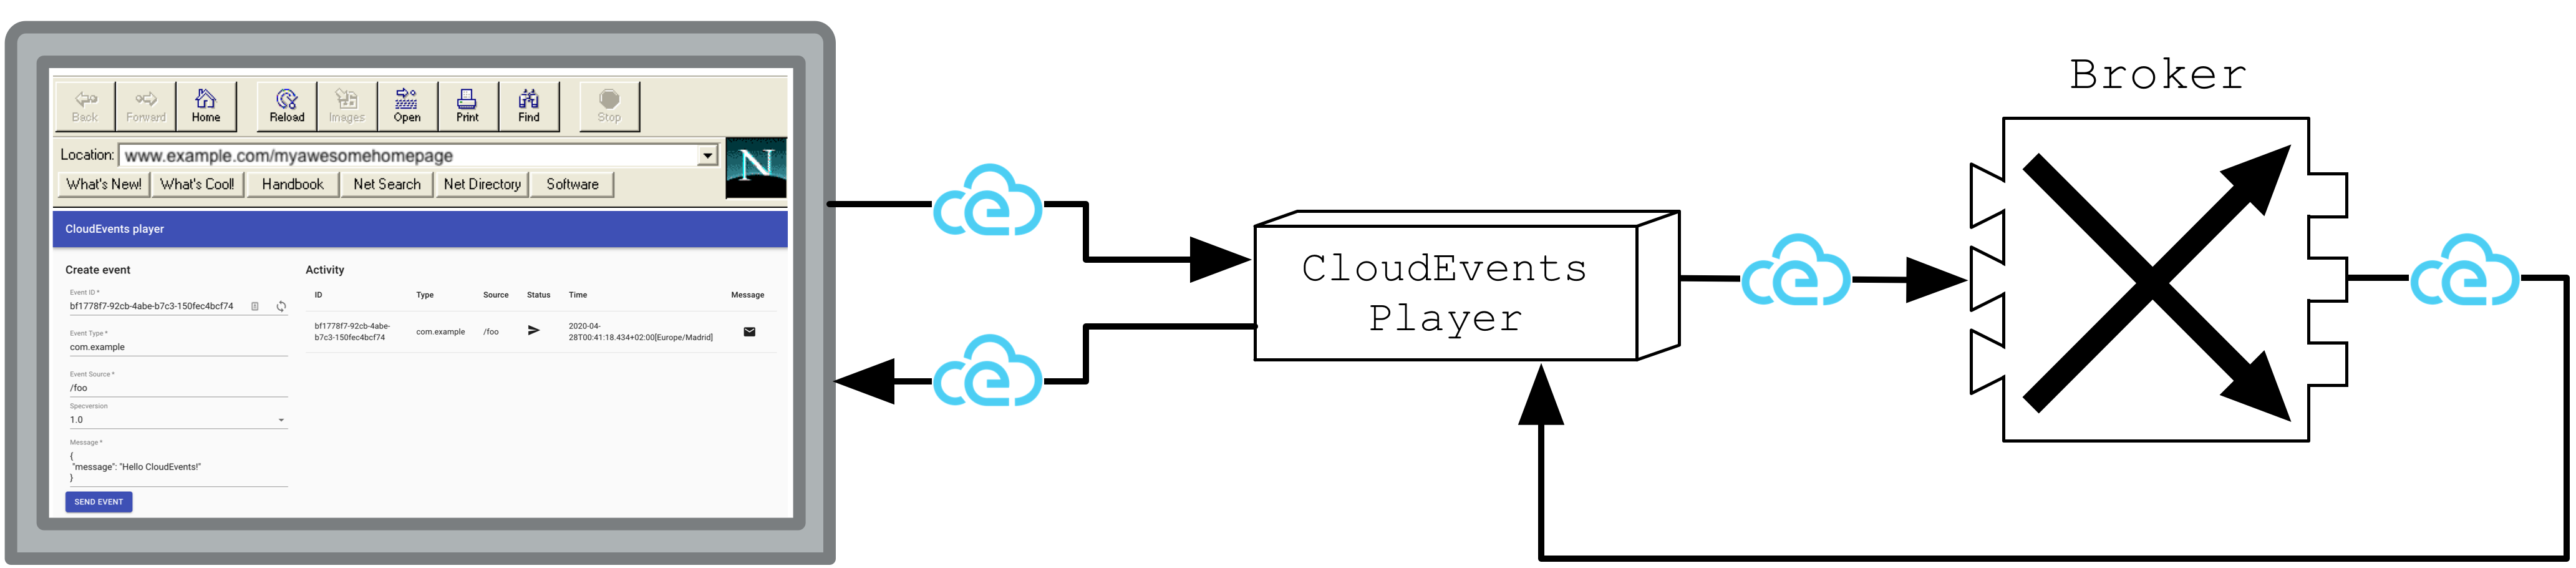
The above image is Figure 6.6 from Knative in Action.
Creating your first source
The CloudEvents Player acts as a Source for CloudEvents by intaking the name of the Broker as an environment variable, BROKER_NAME. If the Broker is
located in a different namespace it is possible to also set the BROKER_NAMESPACE environment variable. Alternatively, you can just use the BROKER_URI.
You will send CloudEvents to the Broker through the CloudEvents Player application.
Create the CloudEvents Player Service:
Run the command:
kn service create cloudevents-player \
--image quay.io/ruben/cloudevents-player:latest
Expected output
Service 'cloudevents-player' created to latest revision 'cloudevents-player-00001' is available at URL:
http://cloudevents-player.default.${LOADBALANCER_IP}.sslip.io
-
Copy the following YAML into a file named
cloudevents-player.yaml:apiVersion: serving.knative.dev/v1 kind: Service metadata: name: cloudevents-player spec: template: metadata: annotations: autoscaling.knative.dev/min-scale: "1" spec: containers: - image: quay.io/ruben/cloudevents-player:latest -
Apply the YAML file by running the command:
kubectl apply -f cloudevents-player.yamlExpected output
service.serving.knative.dev/cloudevents-player created
The service is now running but it doesn't know where the broker is so let's create a SinkBinding between the service and the broker.
Run the command:
kn source binding create ce-player-binding --subject "Service:serving.knative.dev/v1:cloudevents-player" --sink broker:example-broker
Expected output
Sink binding 'ce-player-binding' created in namespace 'default'.
-
Copy the following YAML into a file named
cloudevents-player-binding.yaml:apiVersion: sources.knative.dev/v1 kind: SinkBinding metadata: name: ce-player-binding spec: sink: ref: apiVersion: eventing.knative.dev/v1 kind: Broker name: example-broker subject: apiVersion: serving.knative.dev/v1 kind: Service name: cloudevents-player -
Apply the YAML file by running the command:
kubectl apply -f cloudevents-player-binding.yamlExpected output
sinkbinding.sources.knative.dev/ce-player-binding created
Examining the CloudEvents Player
You can use the CloudEvents Player to send and receive CloudEvents. If you open the Service URL in your browser, the Create Event form appears.
The Service URL is http://cloudevents-player.default.${LOADBALANCER_IP}.sslip.io,
for example, http://cloudevents-player.default.127.0.0.1.sslip.io for kind.
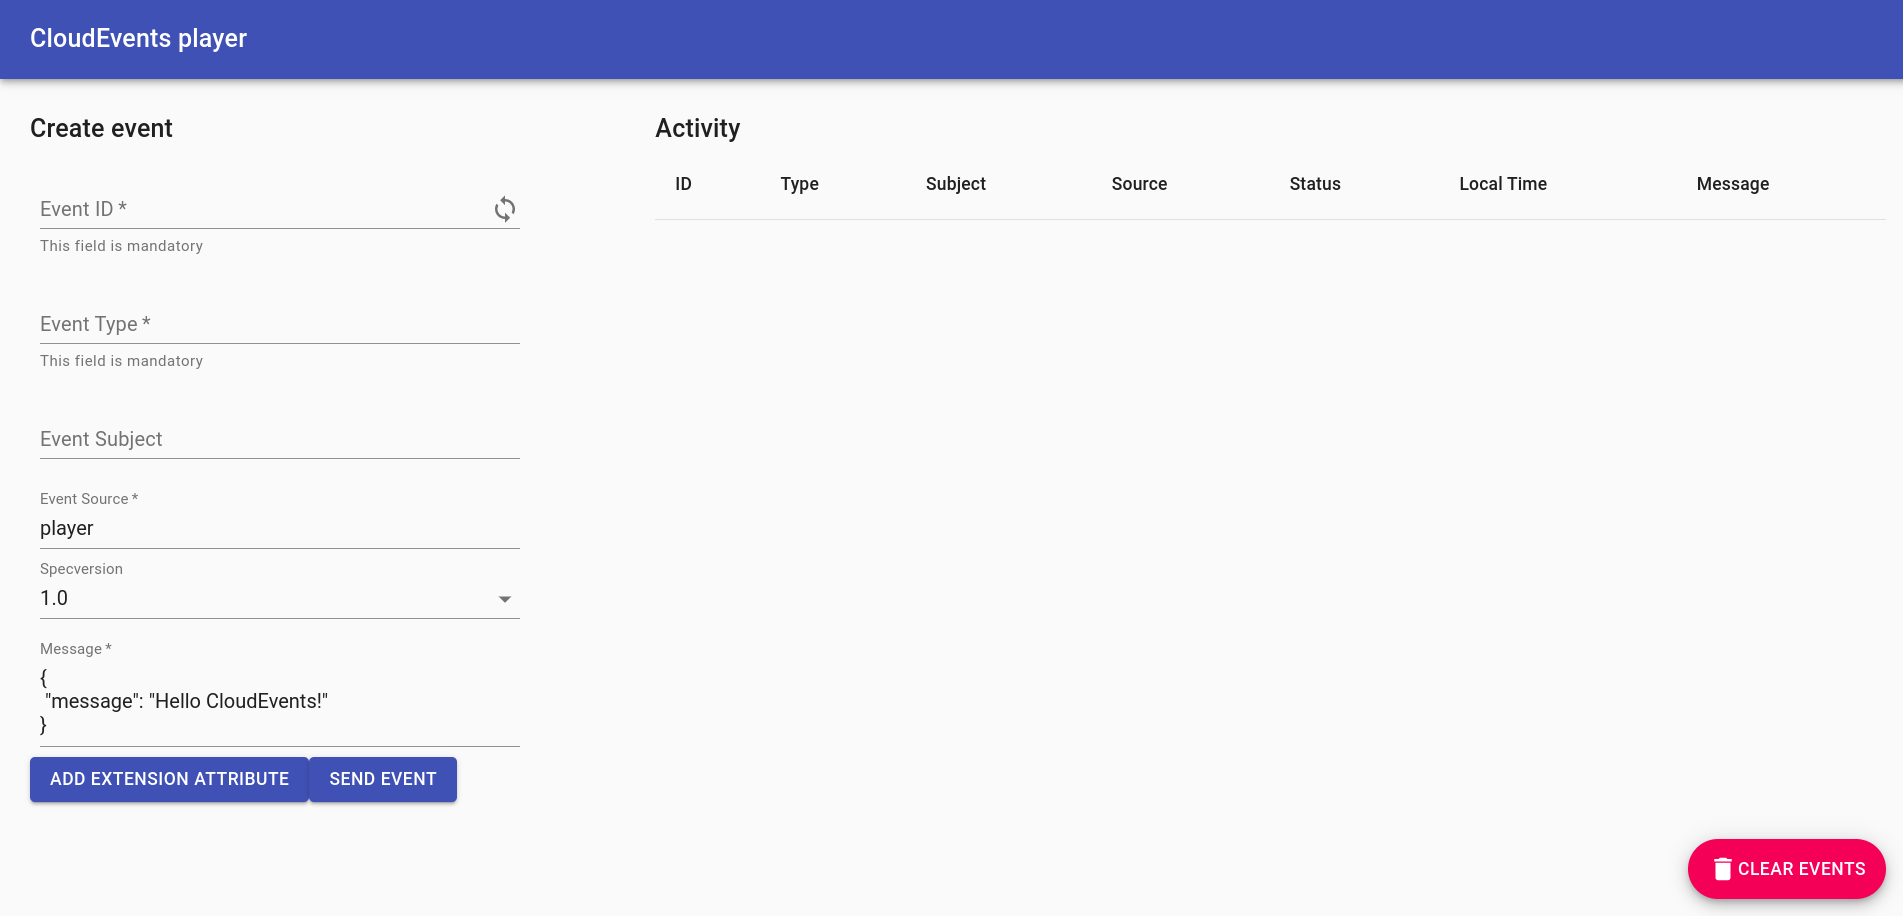
What do these fields mean?
| Field | Description |
|---|---|
Event ID |
A unique ID. Click the loop icon to generate a new one. |
Event Type |
An event type. |
Event Source |
An event source. |
Specversion |
Demarcates which CloudEvents spec you're using (should always be 1.0). |
Message |
The data section of the CloudEvent, a payload which is carrying the data you care to be delivered. |
For more information on the CloudEvents Specification, check out the CloudEvents Spec.
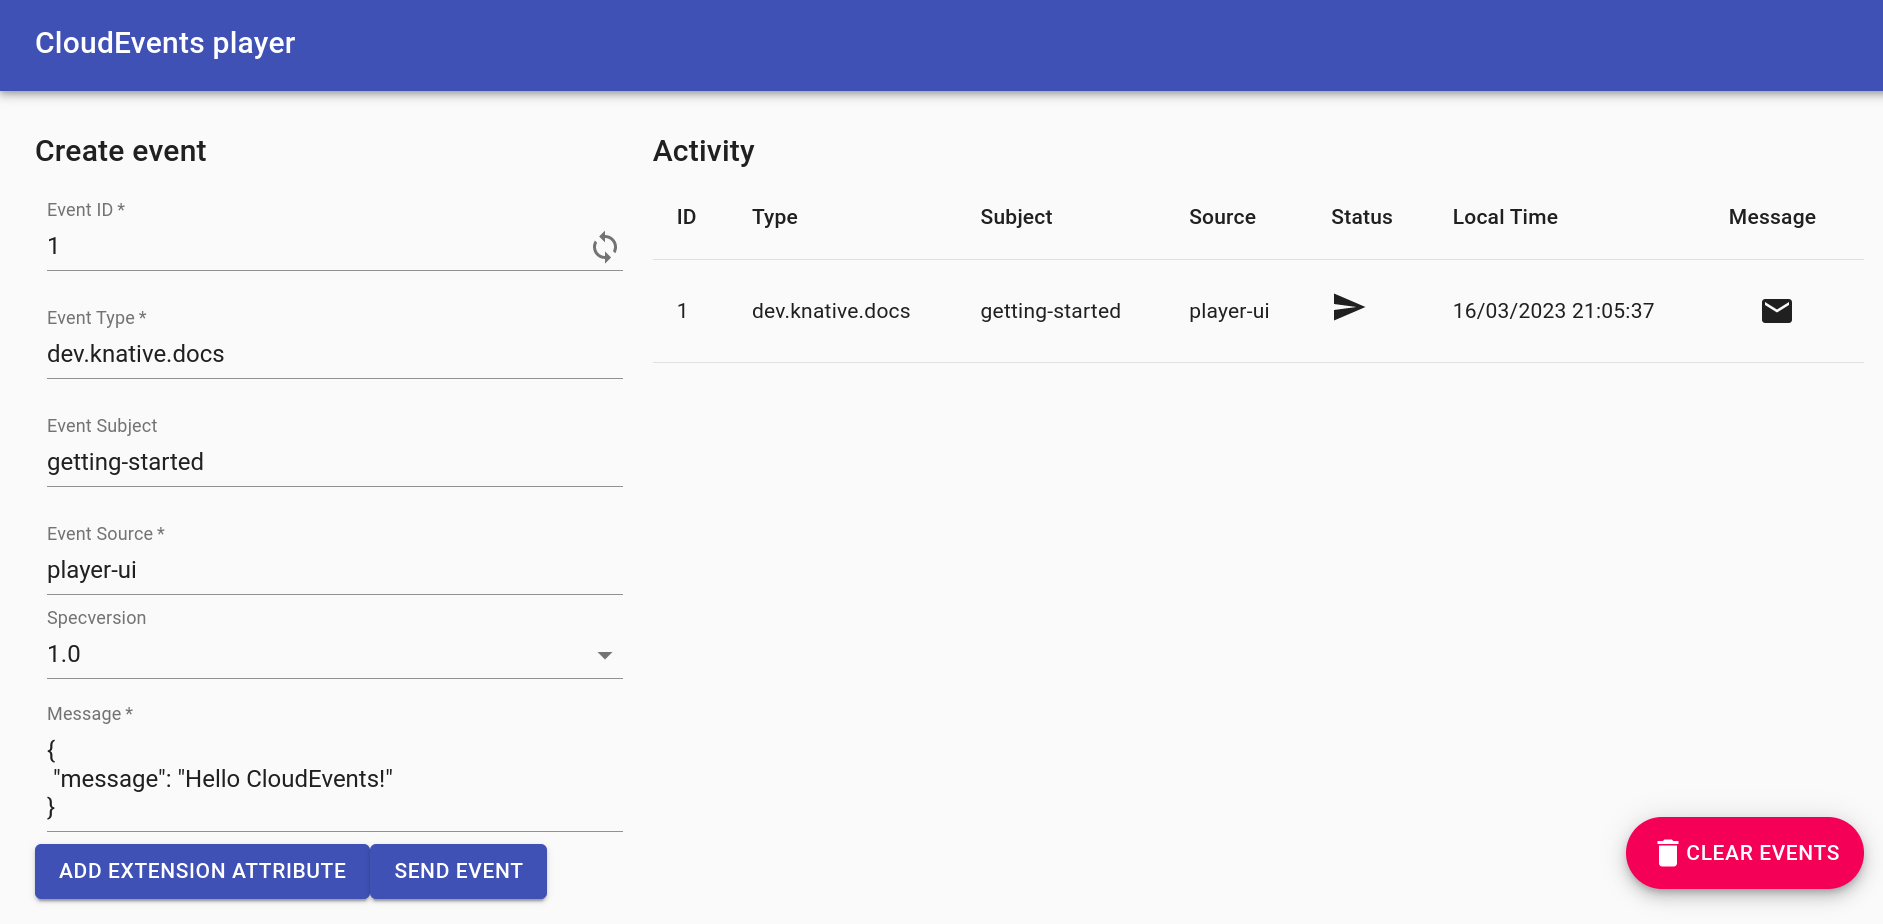
Sending an event
Try sending an event using the CloudEvents Player interface:
- Fill in the form with whatever data you want.
- Ensure your Event Source does not contain any spaces.
- Click SEND EVENT.
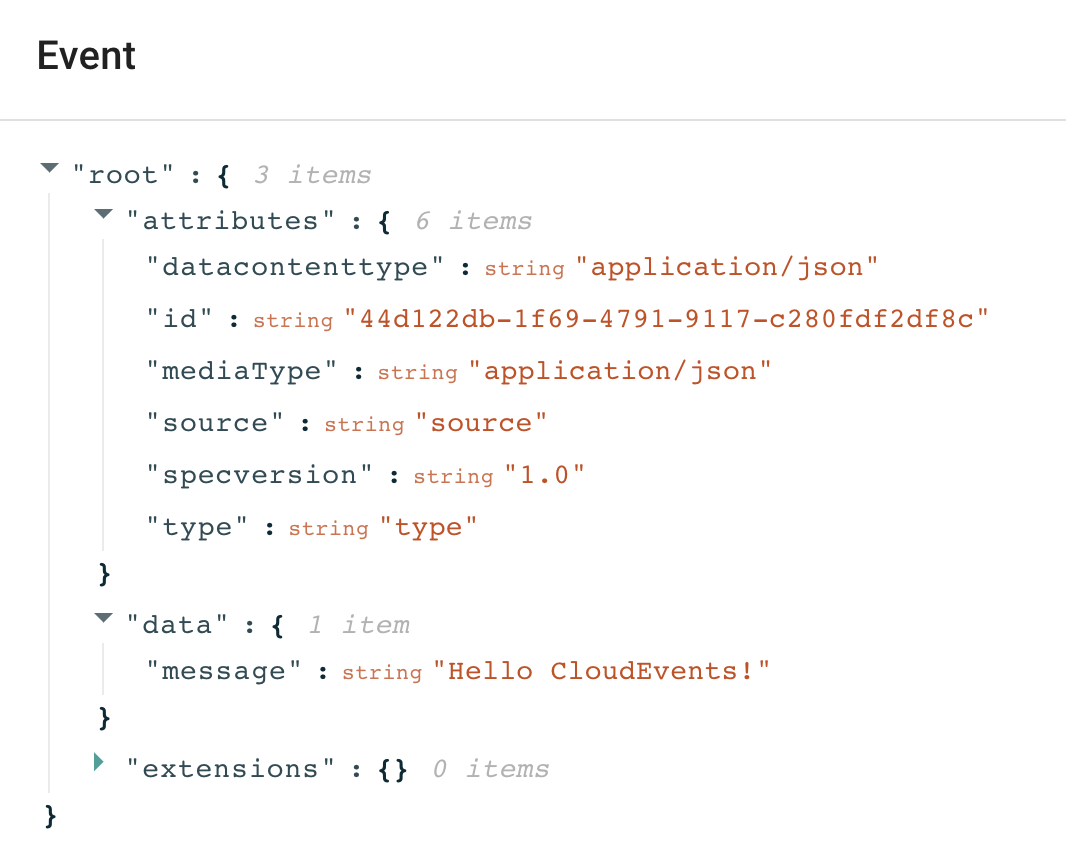
Clicking the shows you the CloudEvent as the Broker sees it.
Want to send events using the command line instead?
As an alternative to the Web form, events can also be sent/viewed using the command line.
To post an event:
curl -i http://cloudevents-player.default.${LOADBALANCER_IP}.sslip.io \
    -H "Content-Type: application/json" \
    -H "Ce-Id: 123456789" \
    -H "Ce-Specversion: 1.0" \
    -H "Ce-Type: some-type" \
    -H "Ce-Source: command-line" \
    -d '{"msg":"Hello CloudEvents!"}'
And to view events:
curl http://cloudevents-player.default.${LOADBALANCER_IP}.sslip.io/messages
The icon in the "Status" column implies that the event has been sent to our Broker... but where has the event gone? Well, right now, nowhere!
A Broker is simply a receptacle for events. In order for your events to be sent anywhere, you must create a Trigger which listens for your events and places them somewhere. And, you're in luck; you'll create your first Trigger on the next page!